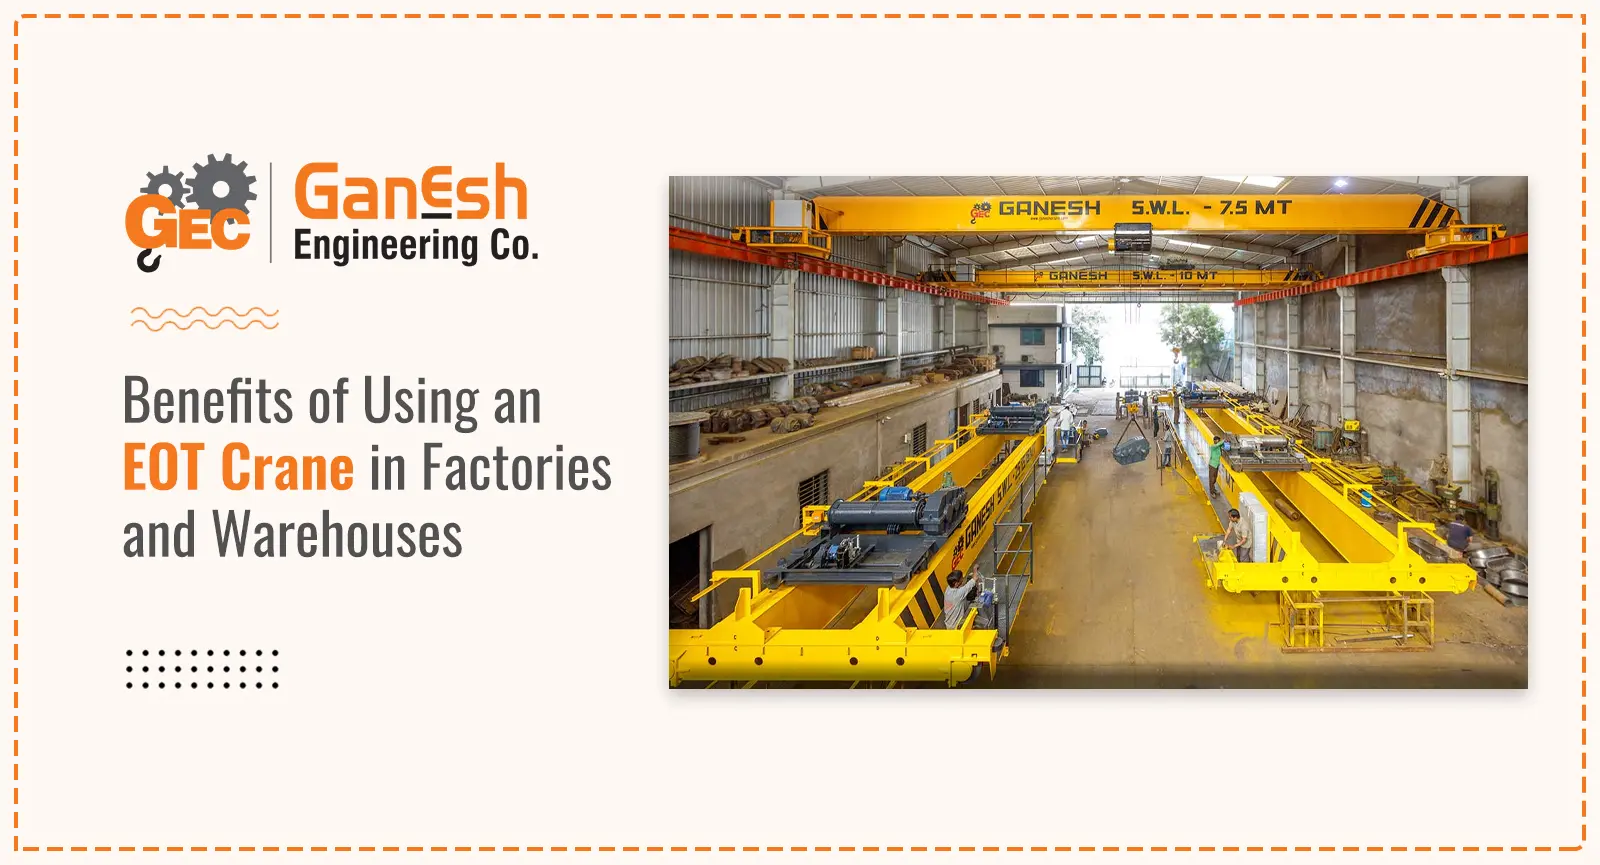
EOT cranes are basically the muscles of a factory. They do all the heavy lifting and moving that humans simply can’t. But because these machines are built to carry tons of weight over people’s heads, you can’t just throw them together.
Getting the installation right is what keeps the crane moving smoothly and, more importantly, keeps the workplace safe. It isn’t something you finish in an afternoon; it’s a detailed process that requires a lot of prep, careful bolting, and plenty of testing before you ever put it to work.
Here is a simple plan to actually get the EOT crane up and running.
What does “installation” really involve?
Even though EOT cranes are built in a factory, they don’t ship as one giant piece. They arrive as a kit of heavy-duty parts. Installation is the job of taking those girders, motors, and cables and building them into your specific facility. Every bolt and every wire has to be perfect so the crane doesn’t just lift, but lifts safely.
The Step-by-Step Breakdown
1. Sizing up the site
Before anything arrives on a truck, you have to look at the building itself. Check the span, the height, and the strength of the existing structure. This planning phase is where you catch potential headaches—like a beam that’s in the way or a floor that isn’t quite level—before they become expensive problems.
2. Checking the gear
Once the parts show up, inspect everything. Look at the girders, the hoists, the trolleys, and every electrical component. Look for any shipping damage and make sure every single part matches the specs you ordered.
3. Setting the tracks
This is probably the most precise part of the whole job. You install the runway beams and the rails that the EOT cranes travel on. If these rails are even slightly crooked, the crane will “crab” or jerk as it moves, which wears out the wheels and motors fast. So, make sure they are dead straight and perfectly level.
4. Raising the bridge
It’s time to start the heavy lifting. Using jacks or a mobile crane, the main bridge girder is assembled on the ground and raised onto the rails. Double-check the alignment once it’s up there to make sure it’s precisely positioned and balanced.
5. Fitting the trolley and hoist
Once your bridge is locked in, it’s time for the trolley and the hoist. The trolley handles the side-to-side movement, and the hoist does the vertical lifting. Before you even think about power, push them back and forth by hand.
6. The wiring phase
With the heavy metal in place, you can bring in the electricians. They’ll wire up your remote or pendant, set up the control panels, and run your main power lines. This is also when you set your limit switches. They stop the crane if it gets too close to the end of the track.
7. Putting it to the test
Never skip the testing. First, run the crane empty to make sure the buttons actually do what they say. After that, you need a “load test.” Pick up a specific weight to prove the crane can handle its full capacity without breaking a sweat.
The Bottom Line
A proper installation is the difference between an EOT crane that lasts twenty years and one that breaks down every month. It’s all about doing the small things right from the start.
Ganesh Engineering Co. specializes in both building easy to install EOT cranes. They focus on making sure every machine they put in is tough, safe, and ready for a long life of heavy work. With years of experience in the field, they provide the kind of crane solutions that industrial businesses can actually depend on.
Ganesh Engineering
Ganesh Engineering Co. has been a leading manufacturer of Materials Handling Equipment in India since 2004. In order to provide top-notch products and services, our experienced and dedicated team utilizes the latest technology to achieve perfection.